
15 min read
Creating Social Media Accounts
Step-by-step guide to creating professional social media pages for your real estate business.
In today's digital-first real estate market, a strong social media presence isn't optional—it's essential. With over 2.9 billion Facebook users and 2 billion Instagram users worldwide, these platforms offer unprecedented reach for real estate professionals. Professional business accounts help you reach potential buyers and sellers, showcase your listings, and build lasting relationships with your community.
This comprehensive guide walks you through creating professional social media accounts specifically designed for real estate agents. We'll cover both Facebook Business Pages and Instagram Professional Accounts. Once created, you'll connect them to Orchestate to automate your content scheduling, manage multiple platforms from one dashboard, and grow your real estate business efficiently.
Choose Your Platform Setup
Select the platform you want to set up. Each guide provides step-by-step instructions with screenshots.
Facebook Business Pages for Real Estate Agents
Expand Your Reach
Connect with millions of potential clients actively searching for real estate professionals on social media.
Build Credibility
A professional page establishes trust and showcases your expertise, listings, and client testimonials.
Consistent Presence
Schedule posts in advance with Orchestate to maintain a regular presence without daily effort.
Track Performance
Monitor engagement metrics to understand what content resonates with your audience.
Real Estate Marketing Advantage
According to the National Association of Realtors, 87% of real estate agents use Facebook as their primary social media platform. A professional Facebook Business Page allows you to run targeted ads, showcase virtual tours, share market insights, and generate qualified leads—all while building your personal brand as a trusted local expert.
Step-by-Step: Creating Your Facebook Business Page
Follow this comprehensive tutorial to set up your professional Facebook Page for real estate. We'll walk you through every click, from logging in to customizing your page for maximum impact.
1
Access Facebook and Navigate to Pages
Log in to your personal Facebook account and access the Pages section from the main menu.
Visual Walkthrough

Facebook Homepage
Start from your main feed
Open Menu
Click the menu icon in the left sidebar
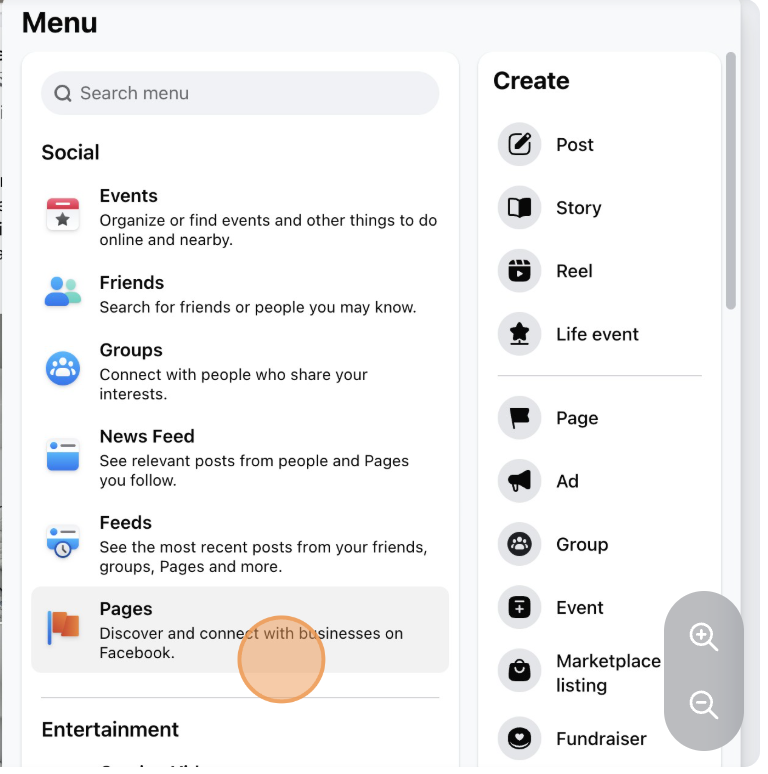
Find Pages
Locate 'Pages' in the menu
Begin by logging into your personal Facebook account at facebook.com. From your main feed, click on the menu icon (usually represented by nine dots or three horizontal lines) located in the left sidebar. Scroll through the menu options until you find "Pages" and click on it to access your Pages dashboard.
Note
First time creating a Page? Don't worry! Facebook makes it easy for beginners. If you don't see "Pages" in your menu, try searching for it using the search bar at the top of Facebook.
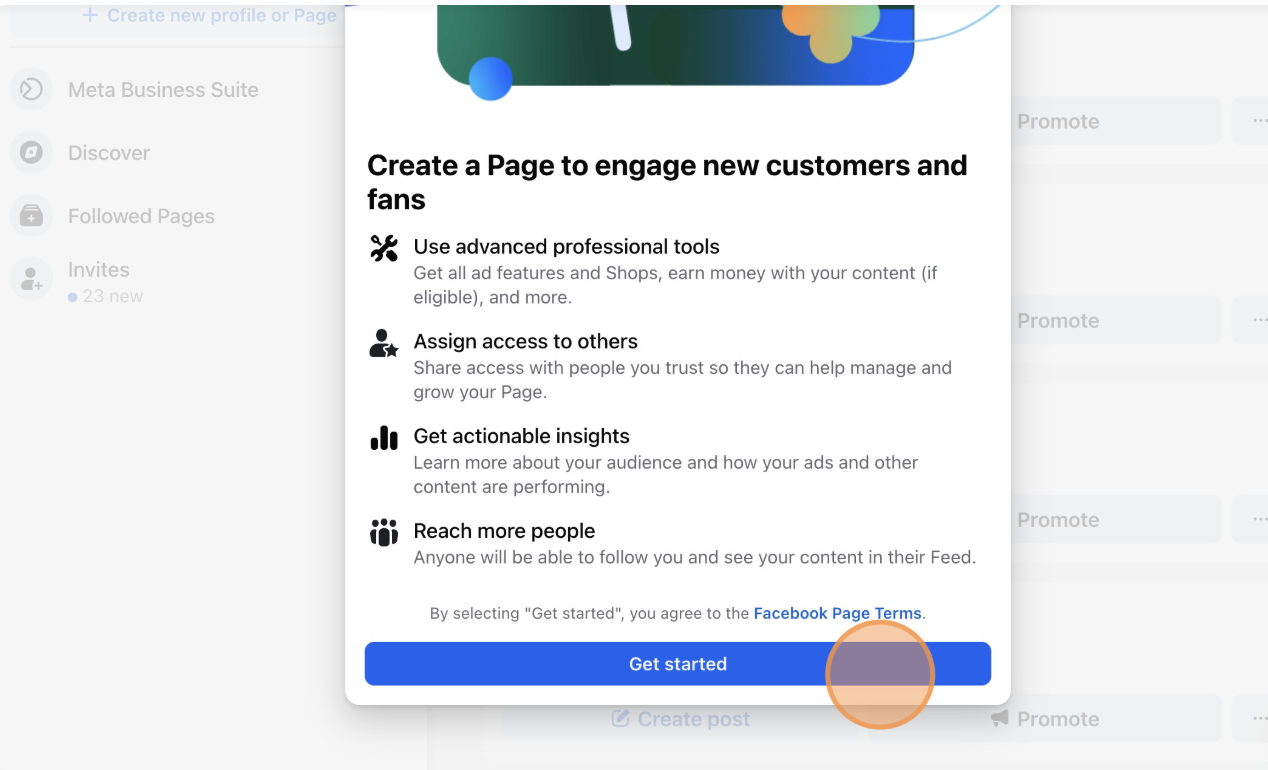
2
Choose Your Page Type and Profile Settings
Select a business page type and configure your initial profile settings for your real estate business.
Profile Configuration

Create New Profile
Select 'Business or Brand'

Public Profile Settings
Set visibility and category

Continue Setup
Click 'Next' to proceed
On the Pages dashboard, click the "Create New Page" button (usually a blue button in the top left corner). Facebook will prompt you to choose between "Business or Brand" and "Community or Public Figure." Select "Business or Brand" as this is the appropriate option for real estate professionals.
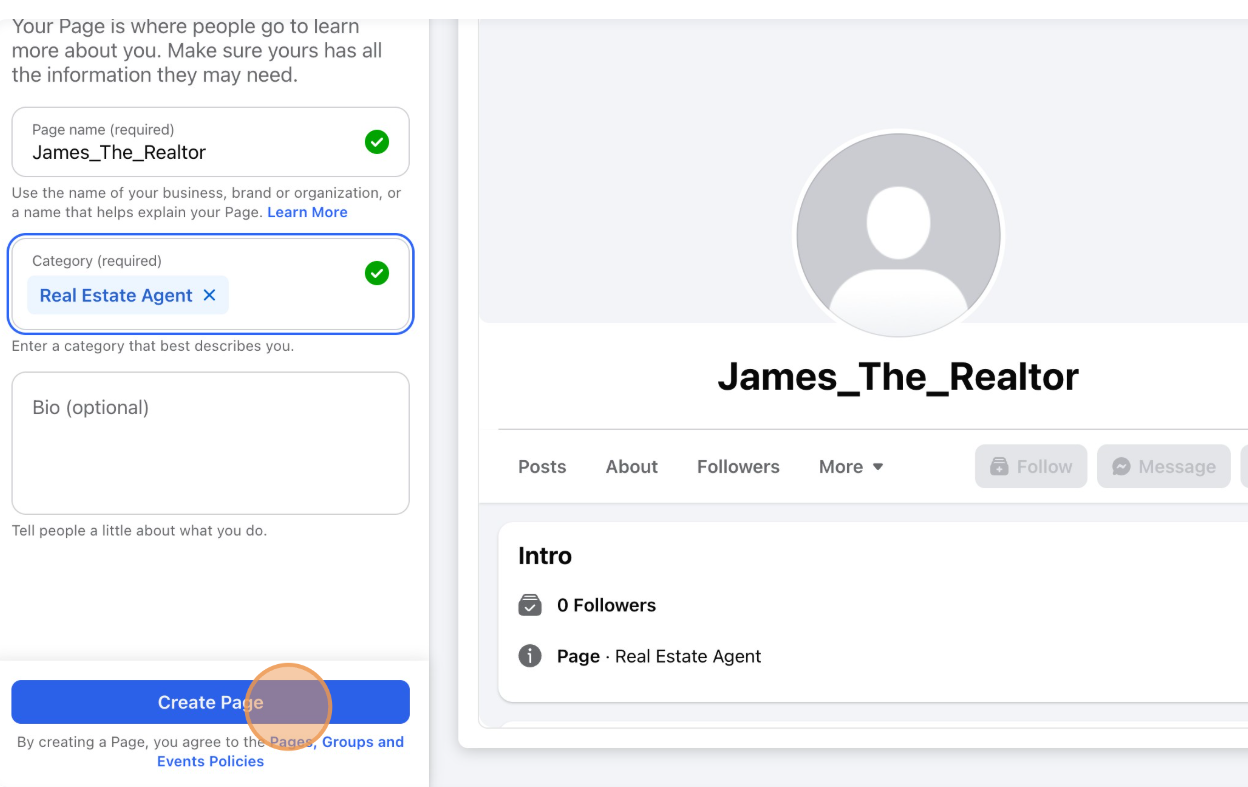
Essential Page Details to Fill Out
Page Name: Use your professional name or team name (e.g., "John Smith Real Estate" or "Smith & Associates Realty")
Category: Type "Real Estate" and select "Real Estate Agent" or "Real Estate Agency" from the dropdown
Bio/Description: Write a compelling 155-character description highlighting your expertise, service area, and unique value proposition
Important
Choose your page name carefully! While you can change it later, Facebook limits how often you can modify your page name. Pick a professional, memorable name that clearly identifies you as a real estate professional in your market.
3
Complete Your Page Setup and Customize
Add profile and cover photos, contact information, and customize your page to match your brand.
Final Setup Steps
Get Started with Setup
Facebook guides you through initial setup
Complete Page Creation
Your professional page is now live!
Facebook will now guide you through a brief setup wizard with prompts to "Get Started." This is where you'll add the visual elements that make your page stand out:
1
Profile Photo (170x170px minimum)
Upload a professional headshot or your company logo. This appears next to all your posts and comments, so choose a clear, high-quality image. Your profile photo should be recognizable even at small sizes.
2
Cover Photo (820x312px recommended)
Your cover photo is prime real estate for branding. Use a high-quality image showcasing a beautiful property, your city skyline, or a branded banner with your contact information and tagline. This is the first impression visitors get of your page.
3
Contact Information & Business Hours
Add your phone number, email address, website URL, and business address. Set your operating hours so potential clients know when they can reach you. This information appears in your "About" section and helps with local search visibility.
4
Call-to-Action Button
Add a prominent CTA button to your page. Options include "Contact Us," "Send Message," "Call Now," or "Learn More." This button appears prominently on your page and drives visitors to take action.
Success
Page optimization tip: Facebook's algorithm favors complete pages. Fill out every section—Services, Awards, About, Story—to improve your visibility in local searches and recommendations. A well-optimized page can appear in search results when people look for real estate agents in your area.
Instagram for Real Estate Agents
Instagram's visual-centric platform is perfect for showcasing properties and building your real estate brand. With over 2 billion active users, Instagram offers unparalleled opportunities for real estate agents to reach potential clients through stunning visual content.
Why Instagram Matters for Real Estate
Instagram's visual storytelling capabilities make it ideal for real estate marketing. Share property tours, before-and-after transformations, neighborhood highlights, and behind-the-scenes content. With features like Stories, Reels, and IGTV, you can engage your audience in multiple creative ways while building trust and authority in your market.
Creating a New Instagram Professional Account
If you don't have an Instagram account yet, follow these steps to create a professional account from scratch specifically for your real estate business.
1
Create Your Instagram Account
Download the Instagram app and sign up with your professional email address.
Account Registration

Sign Up Page
Open Instagram and tap 'Sign up'
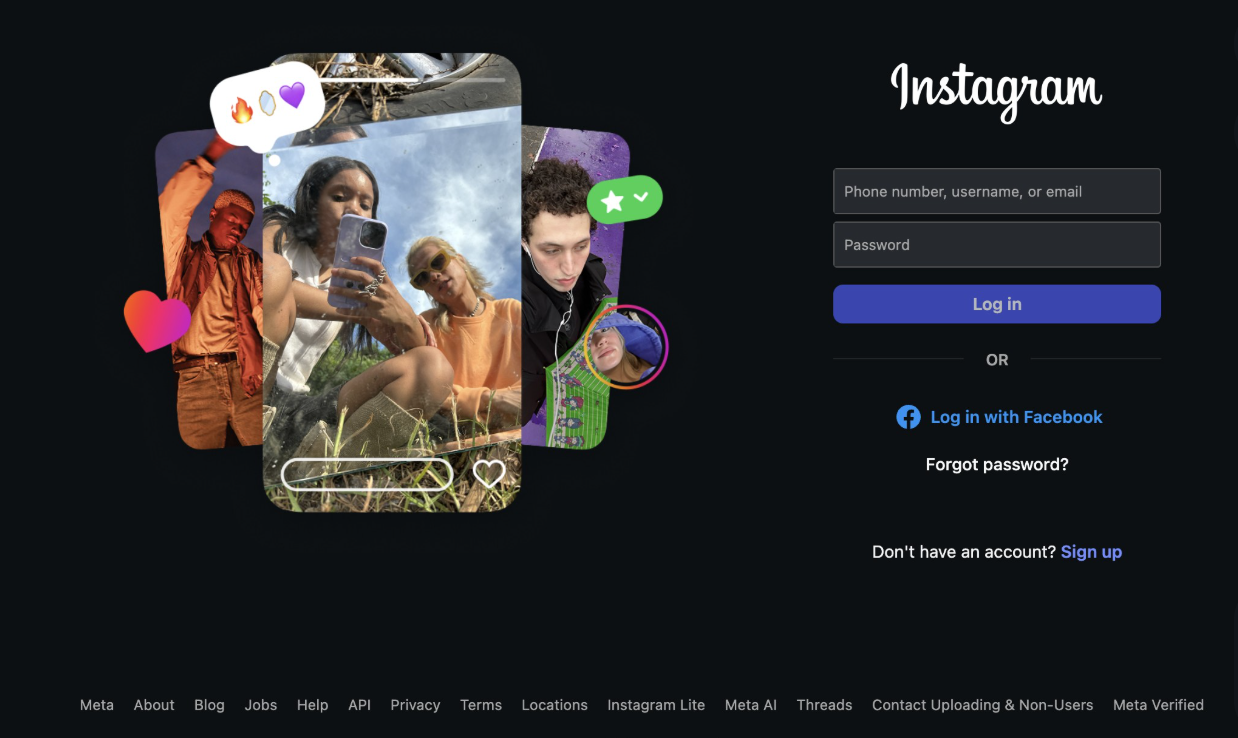
Click Sign Up
Enter your email and tap 'Next'
Submit Information
Fill in your details and submit
Download the Instagram app from the App Store (iOS) or Google Play Store (Android). Tap "Sign up" and enter your professional email address—use the same email you use for your real estate business to keep everything organized. Create a unique username that reflects your real estate brand (e.g., @YourNameRealtor or @CityNameRealty).
Note
Username tips: Keep it professional, easy to remember, and consistent with your other social media handles. Avoid numbers and underscores if possible—they make your username harder to remember and share.
2
Set Up Your Real Estate Profile
Add your professional photo, bio, and contact information to complete your profile.
Profile Completion
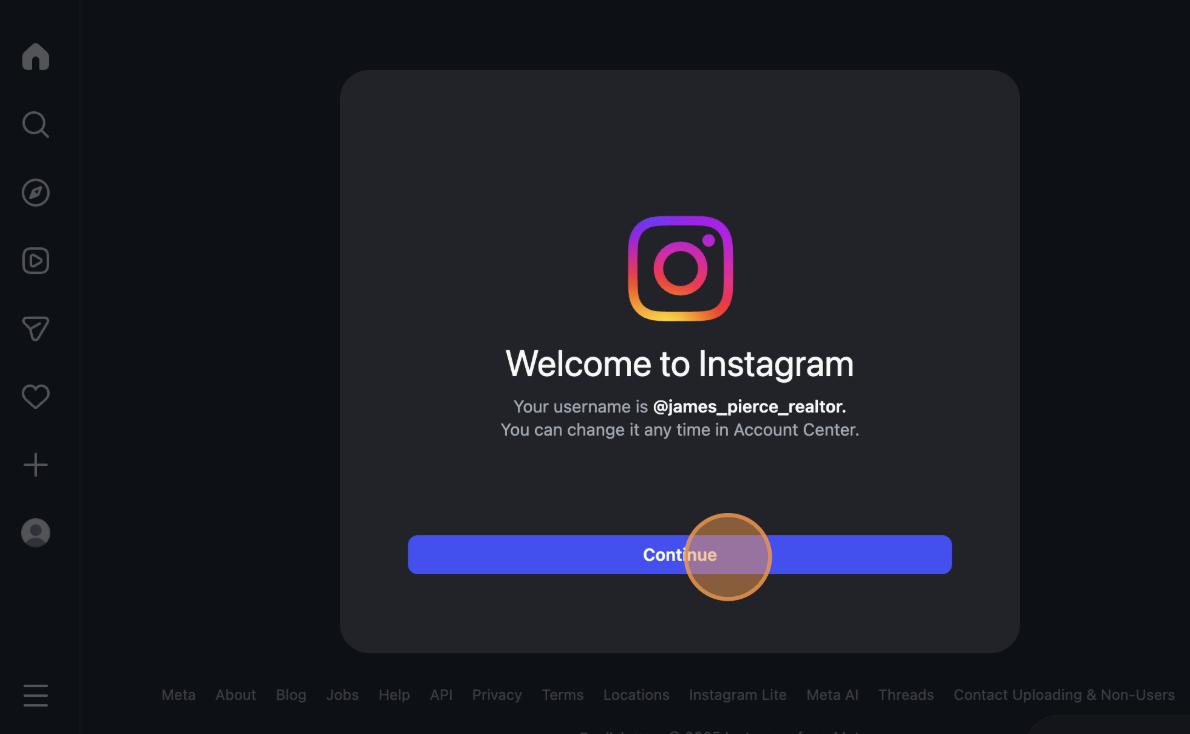
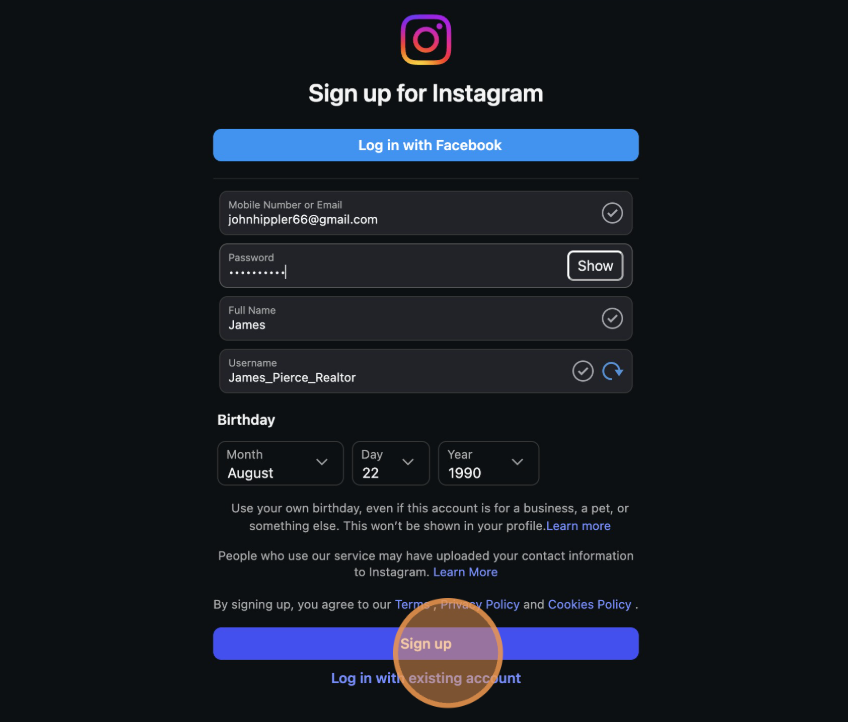
Welcome Screen
Tap 'Continue' to begin setup
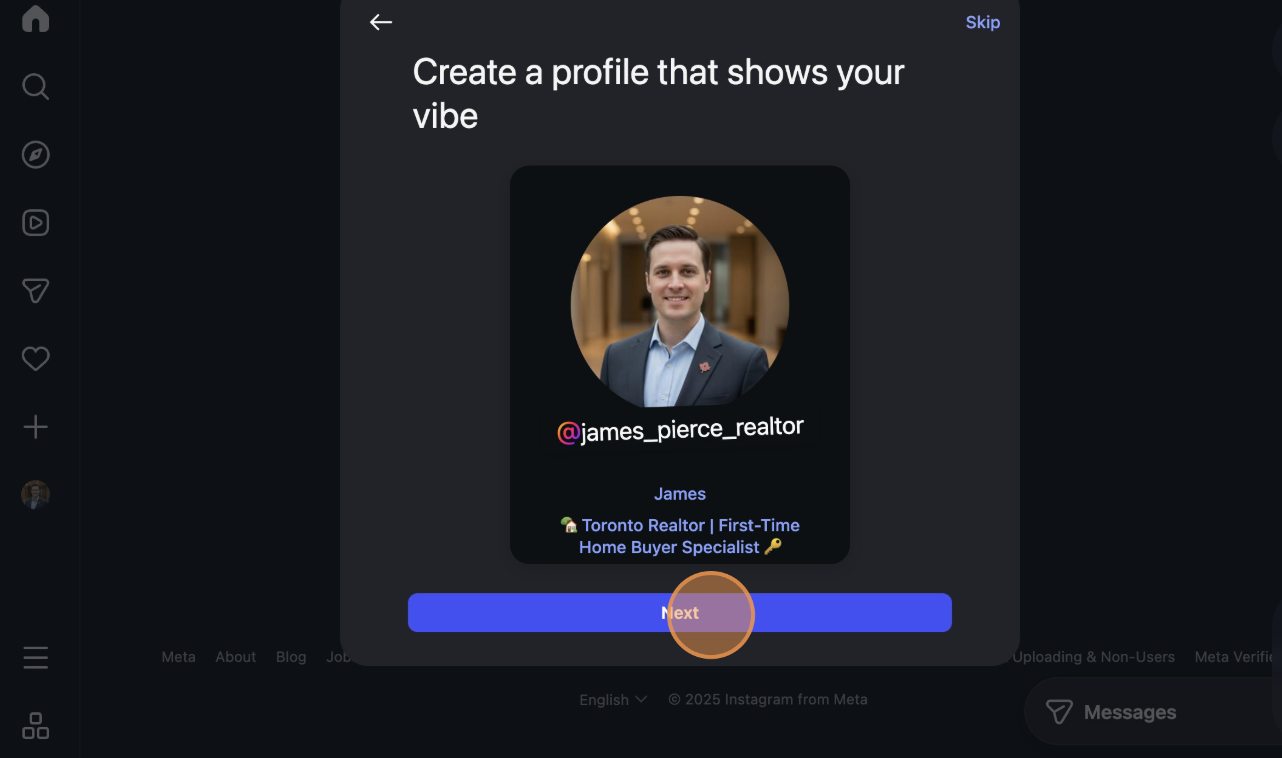
Complete Profile
Upload photo and write your bio
Profile Essentials for Real Estate Agents
Profile Photo: Use a professional headshot with good lighting and a clean background. Your face should be clearly visible—this builds trust with potential clients.
Bio: Write a compelling 150-character bio that includes: your role (Real Estate Agent/Realtor), your service area, and what makes you unique. Add relevant emojis and your license number if required in your state.
Contact Options: Add your business email, phone number, and address so potential clients can easily reach you directly from your profile.
Success
Bio example: "🏡 Luxury Real Estate Agent | Serving Miami & Broward County | Helping families find their dream homes 🔑 | DM for private showings"
Next Step: Convert to Professional Account
Now that your account is created, continue below to convert it to a Professional Account. This unlocks business features like insights, contact buttons, and the ability to run ads.
Converting to Instagram Professional Account
Whether you just created a new account or have an existing personal Instagram account, follow these steps to convert it to a Professional Account and unlock business features essential for real estate marketing.
1
Access Your Account Settings
Navigate to your profile settings to begin the conversion to a professional account.
Navigate to Settings
Instagram Homepage
Go to your profile page
Options Menu
Tap the menu icon (three lines)
Settings
Select 'Settings and privacy'
From your Instagram homepage, tap your profile icon in the bottom right corner. Then tap the menu icon (three horizontal lines) in the top right corner of your profile. Select "Settings and privacy" from the menu options to access your account settings.
2
Switch to Professional Account
Locate the account type settings and initiate the switch to a professional account.
Initiate Account Conversion
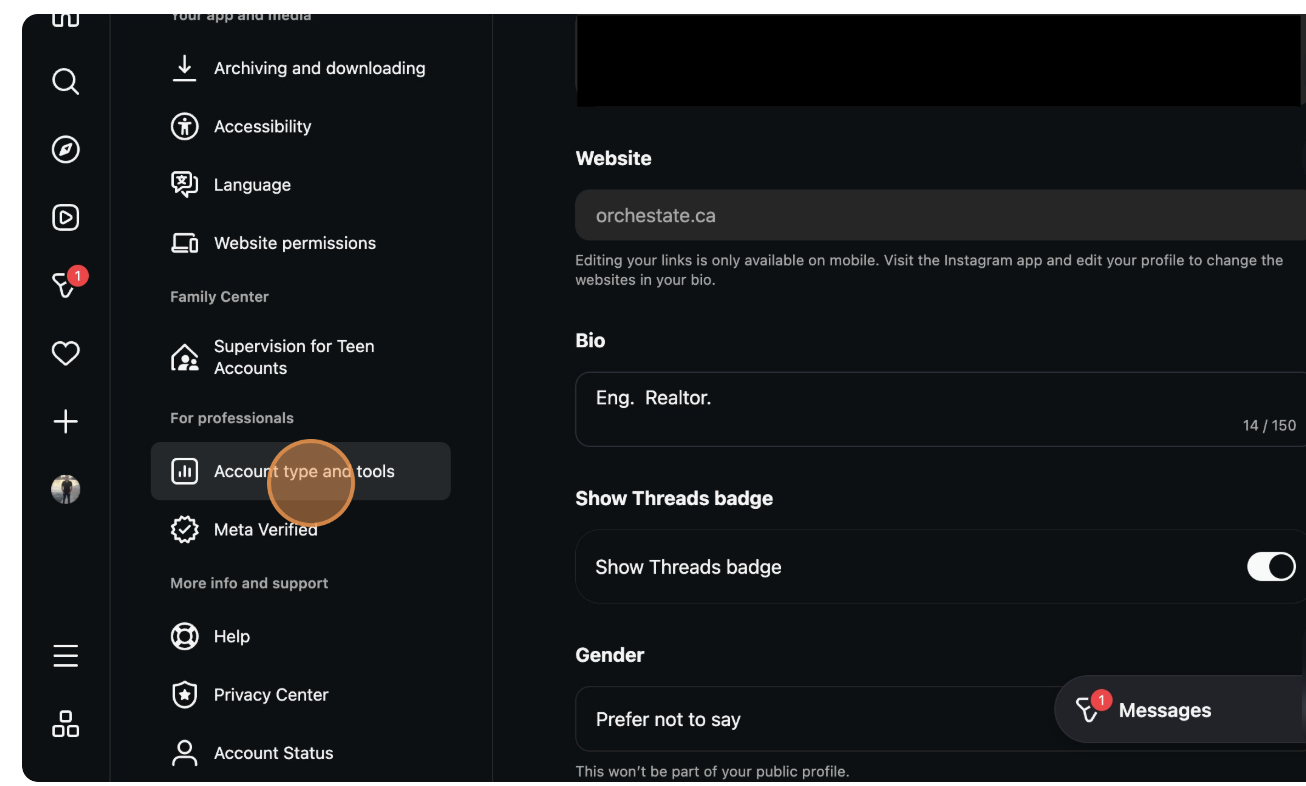
Account Type & Tools
Find account type options
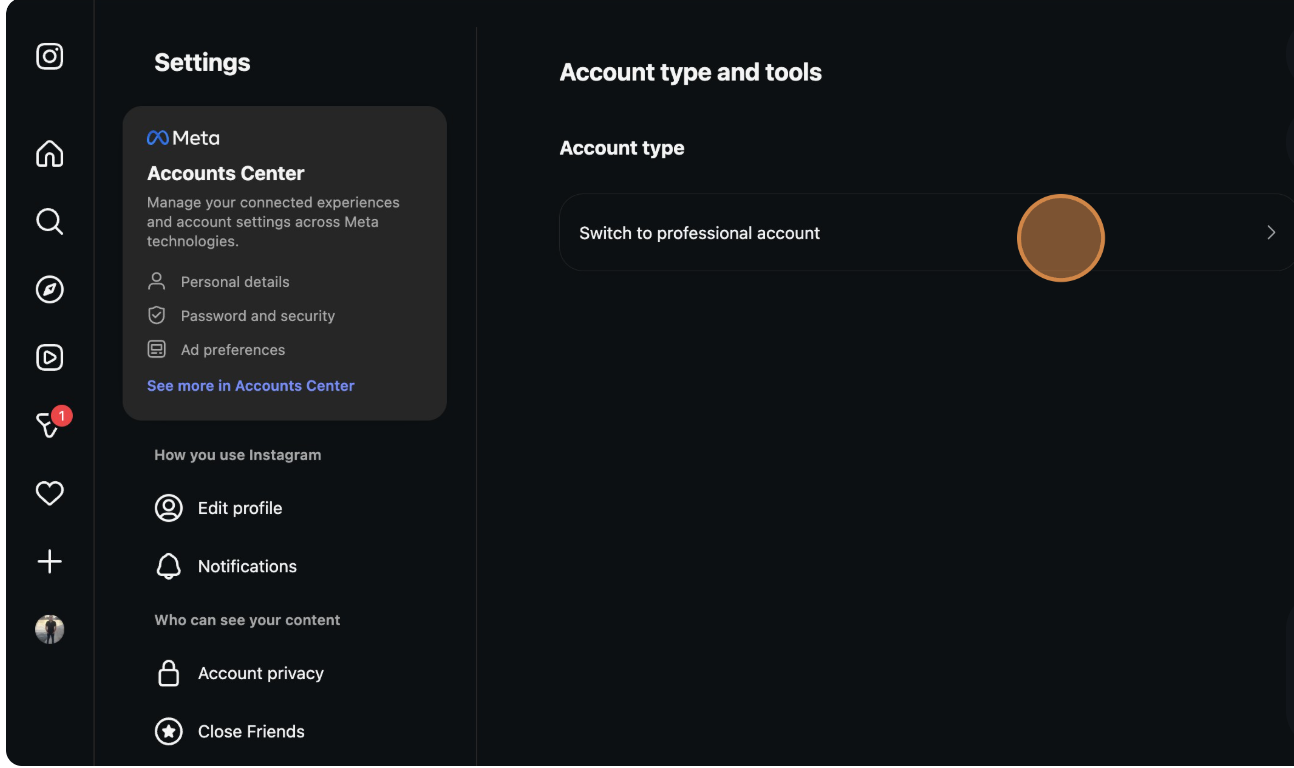
Switch Option
Tap 'Switch to professional account'
In Settings, scroll down and select "Account type and tools." You'll see an option to "Switch to professional account." Tap this option to begin the conversion process. Instagram will guide you through a brief setup wizard.
Note
Don't worry! You can always switch back to a personal account later if needed. However, professional accounts offer valuable insights and business tools that are essential for real estate marketing.
3
Select Business Account & Category
Choose 'Business' account type and select 'Real Estate Agent' as your category.
Category Selection

Business Option
Select 'Business'
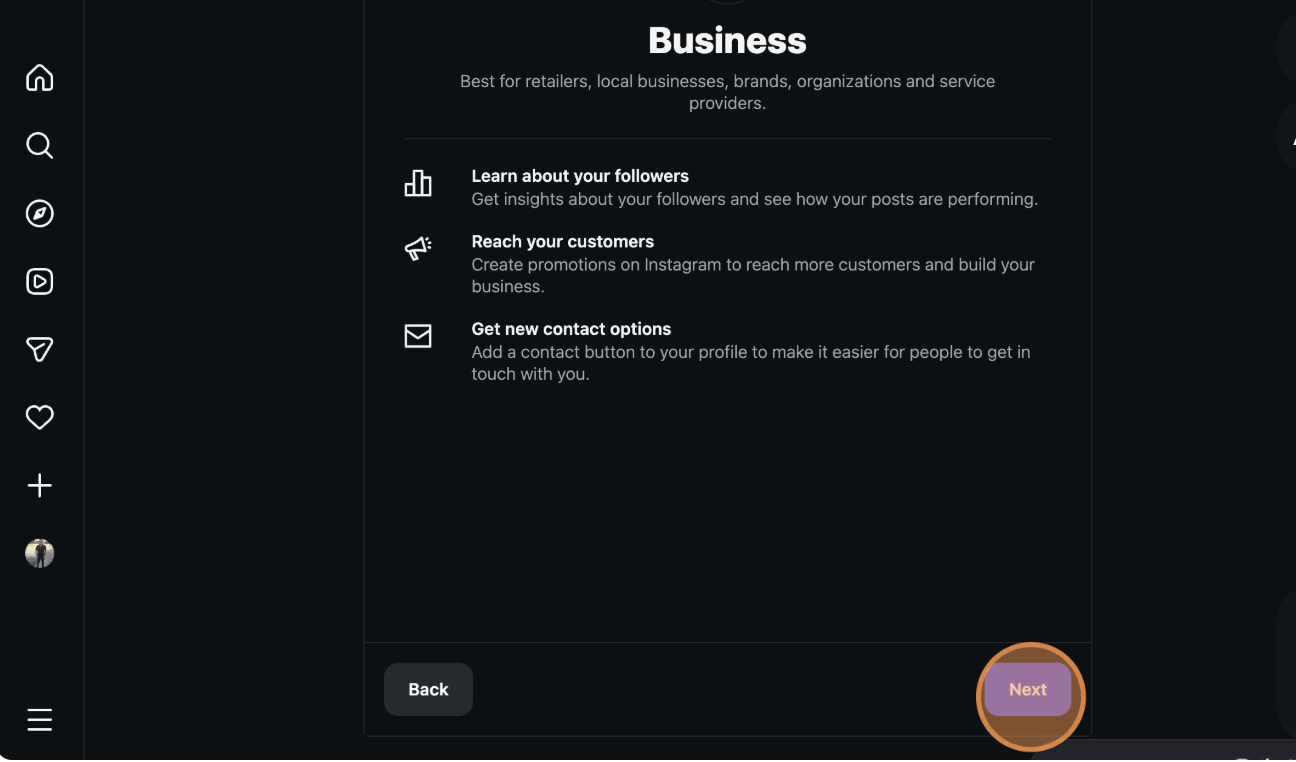
Continue
Tap 'Next' to proceed
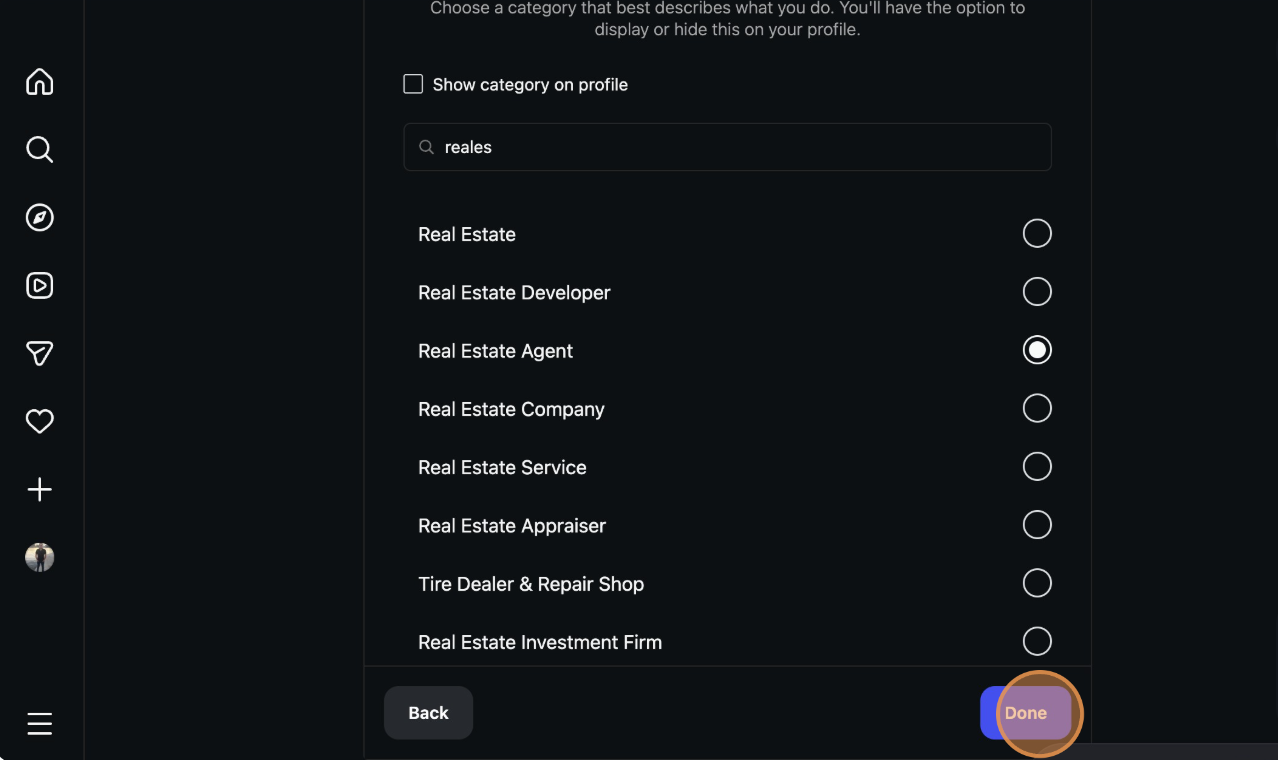
Choose Category
Select 'Real Estate Agent'
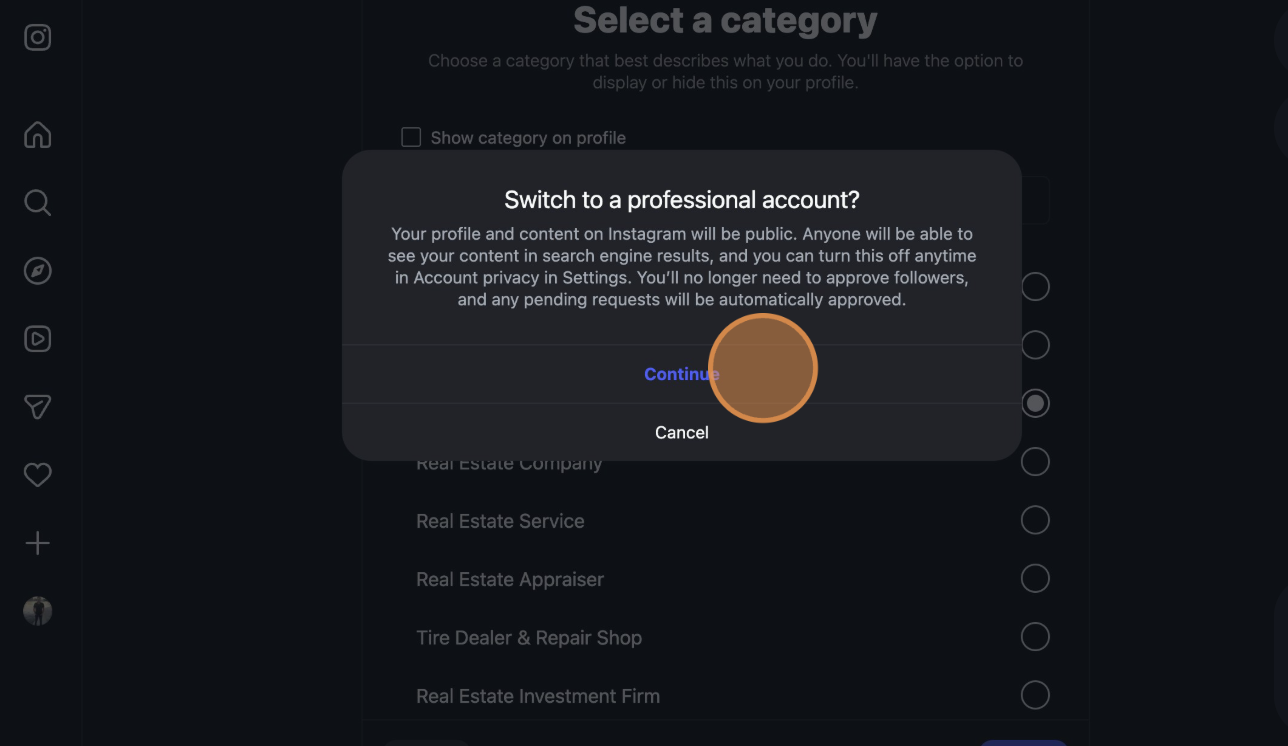
Confirm Setup
Complete the conversion
Complete Your Professional Setup
Step 1: When prompted to choose between Creator and Business, select "Business"—this is the best option for real estate professionals.
Step 2: Tap "Next" to proceed to category selection.
Step 3: Search for and select "Real Estate Agent" as your business category. You can also choose "Real Estate Service" if you run a brokerage.
Step 4: Review your contact information and ensure it's correct. Tap "Done" to complete the conversion.
Congratulations! Your Professional Account is Ready
You now have access to Instagram Insights (analytics), contact buttons, and the ability to run Instagram ads. Start posting high-quality content showcasing your listings, share market insights, and engage with your local community to build your real estate brand on Instagram.
Success
Next steps: Add Story Highlights for "Listings," "Sold Properties," "Client Testimonials," and "Market Tips" to showcase your expertise and create an engaging profile.
Optimize Your Social Media for Maximum Lead Generation
Now that your Facebook and Instagram accounts are set up, follow these best practices to maximize engagement and attract potential clients across both platforms:
Post Consistently
Share valuable content 3-5 times per week. Use Orchestate to schedule posts in advance, ensuring a steady stream of content without daily effort.
Engage with Your Audience
Respond promptly to comments, messages, and reviews. Building relationships through genuine engagement establishes trust and credibility.
Monitor Page Insights
Review your page analytics weekly to understand what content performs best. Adjust your strategy based on engagement metrics and reach.
Use Local Keywords
Include your city, neighborhood, and service area in your bio and posts. This improves local search visibility and attracts nearby clients.
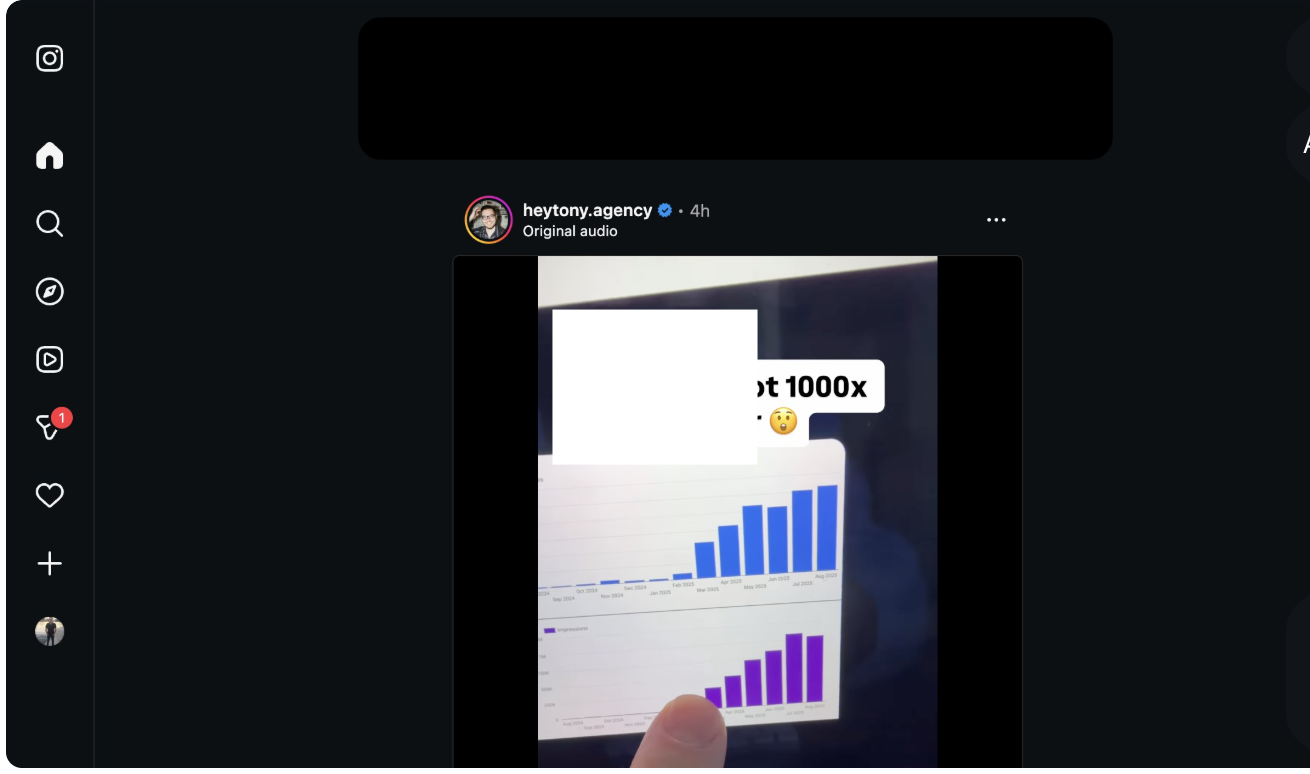
SEO Tip: Optimize Your Profile Information
Improve your discoverability on social media and search engines
Your social media profiles can rank in Google search results! To maximize visibility on both Facebook and Instagram, include these elements in your profile "About" and "Bio" sections:
Location-specific keywords (e.g., "Real Estate Agent in Austin, Texas")
Service descriptions (e.g., "Buyer representation, seller services, luxury homes")
Professional credentials (e.g., "Licensed Realtor, ABR, CRS certified")
Market specializations (e.g., "First-time homebuyers, investment properties")
Ready to Supercharge Your Social Media?
Connect your new accounts to Orchestate
Now that your professional Facebook and Instagram accounts are set up, it's time to unlock their full potential. Connect them to Orchestate to schedule posts across multiple platforms, generate AI-powered content, track analytics, and grow your real estate business—all from one centralized dashboard.
What you can do with Orchestate:
Schedule posts weeks in advance
Generate AI-powered content
Manage multiple social accounts
Track engagement analytics

The all-in-one marketing platform built for real estate professionals across the Greater Toronto Area — Toronto, Mississauga, Brampton, Burlington, and Milton.
© 2026 Orchestate. All rights reserved.
Made with ❤️ for real estate professionals